
March, 18 2024
Building UI with Flutter and Dart
When you build UI with Flutter and Dart, you build it out of widgets. In this Article let’s see simple application and learning about widgets as going.
- Open Visual Studio Code
- From the top menu, click View > Command Palttete or you can hold CTRL+SHIFT+P
- Create a new folder to put the project
- Typing a project name and then Enter on the keyboard
- You will see files and folders regenerated automatically
Look in the lib folder and there is a file named “main.dart”. We will mostly work on the lib folder.
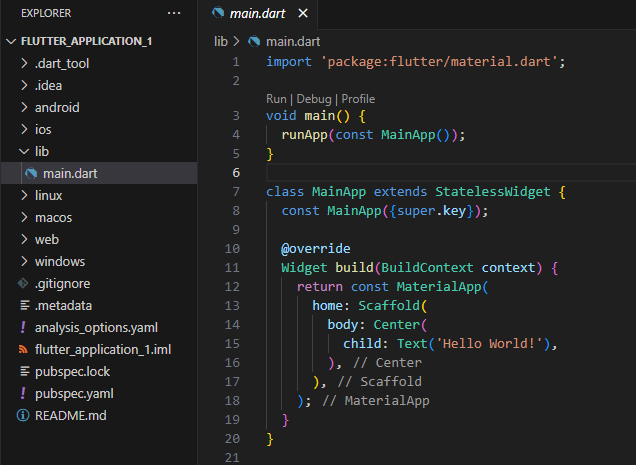
The first line is importing Google’s Material Design (line 1).
import 'package:flutter/material.dart'The main function is responsible for initializing the app and starting the app’s execution. As we can see on the code lines 3 to 5, the argument for this main function is the MainApp class.
void main() {
  runApp(const MainApp());
}
MainApp class is extended from a StatelessWidget class, which means it’s a static widget that cannot change over time. The BuildContext is a fundamental concept in Flutter. It’s an abstract class in the Flutter framework that represents a handle to the location of a widget in the widget tree. Each widget has its own BuildContext, which becomes the parent of the BuildContext for its child widgets.
class MainApp extends StatelessWidget {
const MainApp({super.key});
@override
Widget build(BuildContext context) {
.........................
}
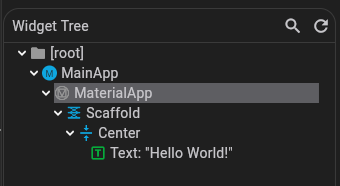
}We can see in Figure 2 above, there is a MaterialApp widget under the class. This means that the application is using Material Design. As the frame, the Scaffold class is used under MaterialApp as home. Scaffold gives you many basic functionalities, like AppBar, BottomNavigationBar, Drawer, FloatingActionButton, etc.
class MainApp extends StatelessWidget {
  const MainApp({super.key});

  @override
  Widget build(BuildContext context) {
    return const MaterialApp(
      home: Scaffold(
        body: Center(
          child: Text('Hello World!'),
        ),
      ),
    );
  }
}
You can see inside the scaffold is the body property. This property is the primary content. As the body, there is the Center widget to align all contents centered. Inside the Center widget is the Text widget as a child.
To run the Flutter application you have some choices:
- You can click on the bottom left to open the command palette or the top menu then click View > Command Palette or CTRL+SHIFT+P.
- Type
flutter and then select the Flutter: Select Device. If no devices are running, this command prompts you to enable a device. - Select a target device from “Select Device” prompt.
- After you select a target, start the app. Go to Run > Start Debugging or press F5.
- Wait for the app to launch. After the build process is complete, the device will show your application
Code 1
import 'package:flutter/material.dart'

void main() {
  runApp(const MainApp());
}

class MainApp extends StatelessWidget {
  const MainApp({super.key});

  @override
  Widget build(BuildContext context) {
    return MaterialApp(
      home: Scaffold(
        body: const Center(
          child: Text('Hello World!'),
        ),
      ),
    );
  }
}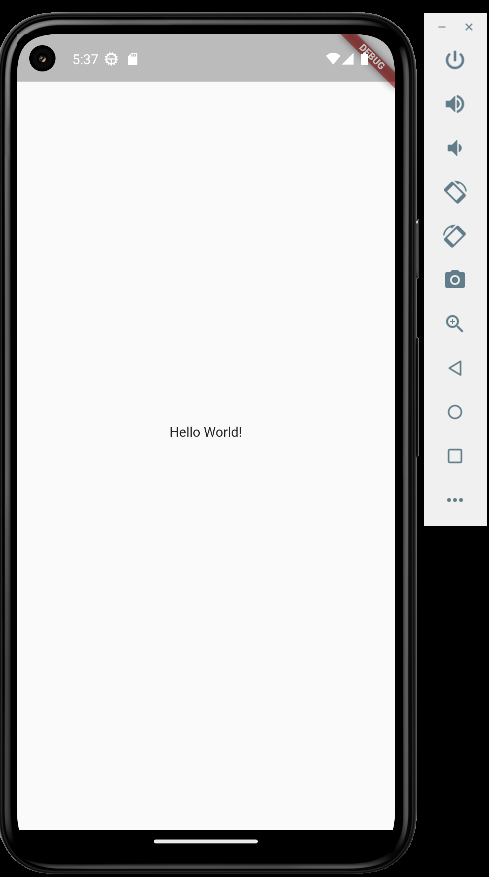
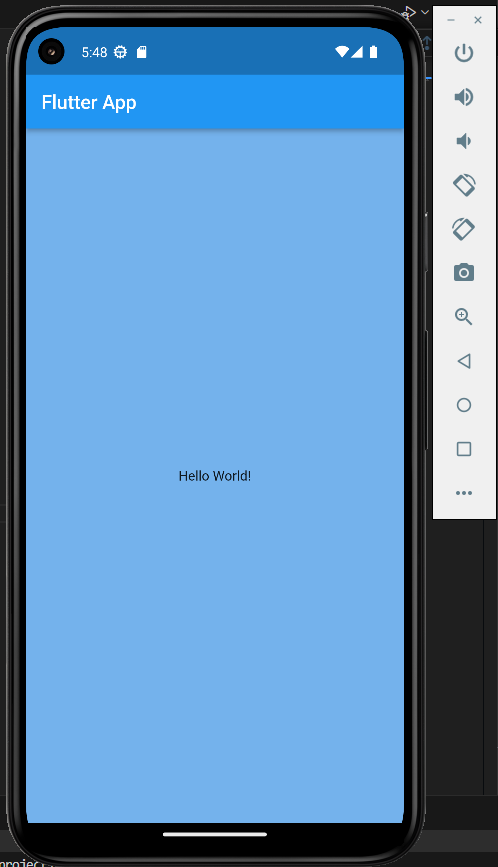
You can see the result of the first application in Figure 3. Now we want to add some modifications to the code. We want to remove the debug banner that always shows on the top left by setting debugShowCheckedModeBanner as false. The debugShowCheckedModeBanner is a property of MaterialApp.
We added an AppBar property on the Scaffold, this will show as a top bar. The last modification is changing the background color by adding a background color property on the Scaffold.
Code 2
import 'package:flutter/material.dart';

void main() {
  runApp(const MainApp());
}

class MainApp extends StatelessWidget {
  const MainApp({super.key});

  @override
  Widget build(BuildContext context) {
    return MaterialApp(
      home: Scaffold(
        backgroundColor: Color.fromARGB(255, 116, 178, 236),
        appBar: AppBar(title: const Text("Flutter App"),),
        body: const Center(
          child: Text('Hello World!'),
        ),
      ),
      debugShowCheckedModeBanner: false,
    );
  }
}
Ok guys that’s all for a simple application with Flutter and Dart
absen